

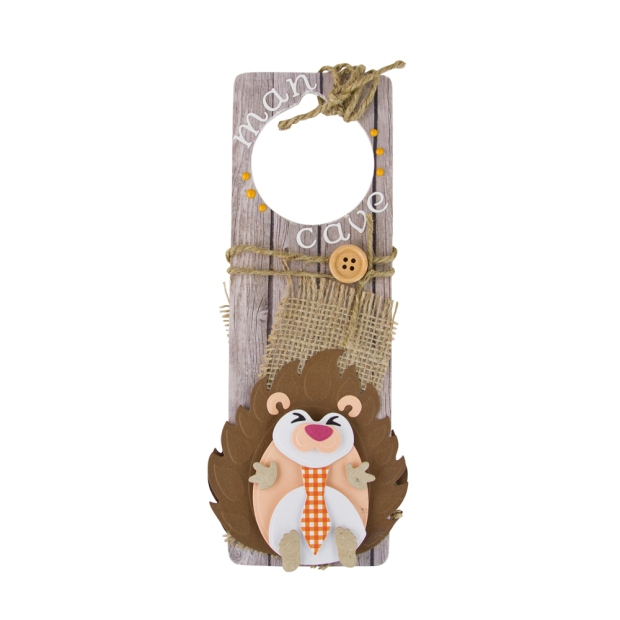
This step-by-step shows how I created the above door hanger, it features the Tonic Studios Woodland Buildable – Harry Hedgehog Die set. The new buildable dies are fabulous as you can make all sorts of little characters from them, and mix and match accessories from each, my hedgehog could have had glasses from the owl die set, a bow from the fox die set or the balloon from the Betty Bunny Die set, they are really versatile. I created a lady hedgehog for my last blog post, so let’s create a boy hedgehog for this tutorial.
This tutorial is in two parts, decorating the door hanger and constructing Harry the Hedgehog.
Decorating the door hanger
1. Cover a shop bought door hanger with wood grain paper and sand the edges to give a distressed look.
2. Cut a small strip of hessian and glue it at an angle on the wood grain paper.
3. Wind your garden string above the hessian and glue on a button. Then, wind more string to the top of the hanger.
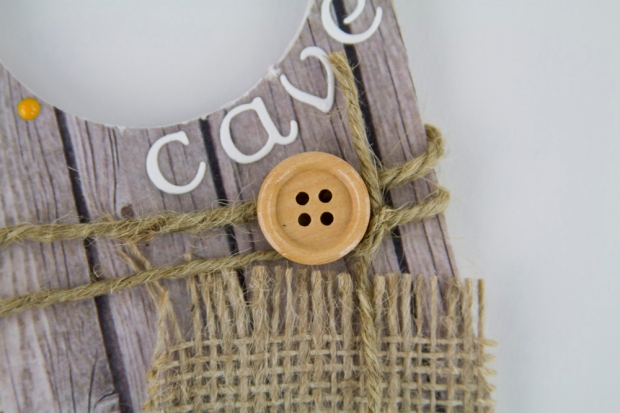
4. Die cut the words ‘Man Cave’ using the Clarice Alphabet Die set and place the letters around the cut out.
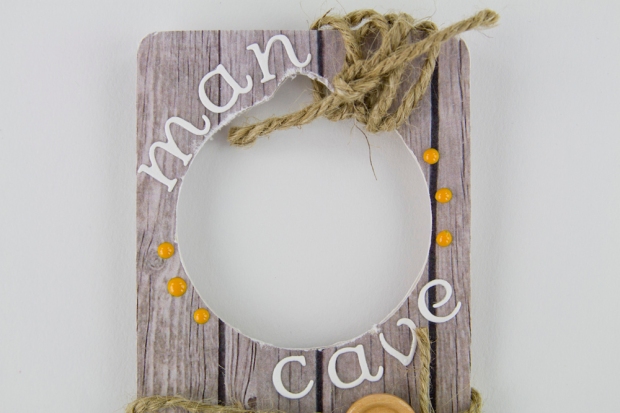
5. And to finish I’ve used English Mustard Nuvo Crystal Drops and leave flat to dry.
Constructing Harry the Hedgehog
And now its time to make Harry the Hedgehog:
1. Using the larger die, cut 1 body shape using Craft Perfect Chocolate Brown card stock.
2. Cut the background tummy shape using Craft Perfect peach colour card stock. Cut out the muzzle and ears using the same colour.
3. Using 3D foam pads, stick the larger piece onto the main body.
4. Cut the main face and lower tummy area in Craft Perfect white card stock. Again, using 3D foam pads, adhere this to the background tummy shape.
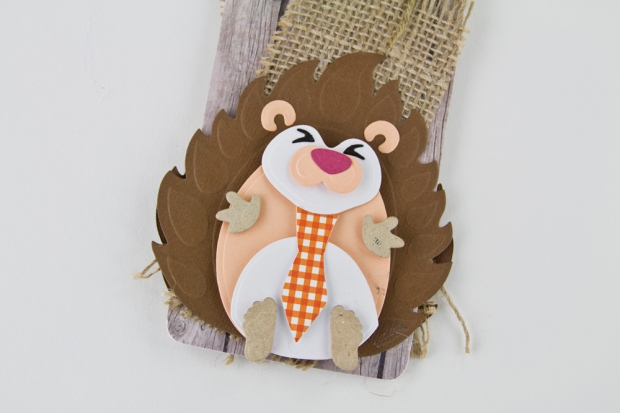
6. Glue the peach muzzle shape onto the white face.
7. Next, cut a nose for Harry using Craft Perfect Blossom Pink card stock and adhere to the muzzle.
8. Using Craft Perfect Kraft Card card stock, cut out the hands and feet.
9. Glue the feet onto the lower tummy area.
10. Glue the face onto the upper body area.
11. Then glue each hand on either side of the tummy, a little lower than the face.
12. Die cut two eyes using Tonic Studios Craft Perfect black? card stock, and glue to the face.
13. Glue the ears either side of the face, just above the muzzle.
14. And finally, cut out the tie and attach to the body.
If you liked this post, please click follow…

I really like seeing how people use dies outside of cards, great idea
LikeLike